Powered EON15 Repair
3/27/2023 This article contains information on repairing JBL EON15 powered speakers.
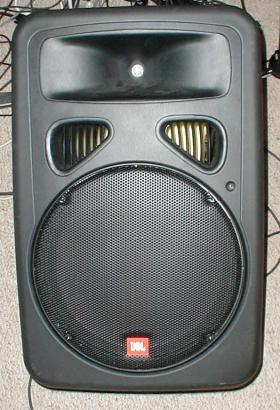
As a proud owner of four JBL EON15 powered monitors, I was deeply saddened when they started dying one by one till they all fell silent. Well, actually, till they all started emitting a horrible loud noise.
As a person who has done repair work on electronic equipment professionally, I knew I'd eventually repair them or get them repaired but let them sit for a quite a while till I had a recent need for, coincidentally, for 4 powered monitors. To google I went and found a great video on YouTube by Funblebork Engineering on the JBL EON15 G2 power supply capacitor replacement repair and had some ideas on how the process could be simplified.

The worst part of the job is unscrewing the 18 screws that hold the thing together. Best to use a varispeed drill with a phillips-head on a long-ish extender if possible. Most of the screws are pretty easy to get at but the bottom two can be tough due to the 4 protuberances on the bottom that act as legs. I was surprised to find that many of the screws were not especially tight. Note that the big mounting screws do NOT need to be removed though the handle does since it blocks a screw beneath it. Be careful not to over-tighten when putting them back in with a drill. Set the torc low; they don`t need to be super tight.
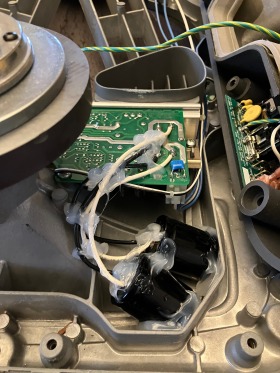
The failure on all 4 of the speakers, it turns out, was a common power supply problem which is solved by installing a new pair of capacitors which, apparently, wear out. My improvement on the process shown in the Fumblebork video was to attach wires to the replacement capacitors and tack them onto the circuit board where the pins from the failing capacitors are sticking through the board leaving the bad parts in place.
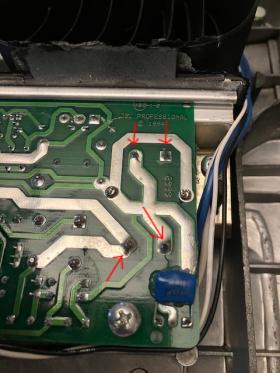
To speed things up, I prepped all of the wires and capacitors ahead of time, tinning each wire and lead (putting some fresh solder on them) so they would attach quickly when connected. The capacitors usually only need to get melted solder on them but you really want to make sure the solder is fully melted into the wire. The strands of wire can build up..something around them and sometimes needs some aggressive heating or scraping to get through. Usually, if the solder is shiny and smooth over the whole surface, you are good. Ripples can indicate cracks so try to get rid of them but don`t overheat the pins of the capacitors. It`s worth noting that I only stripped back about a quarter of an inch of shielding off the wires.
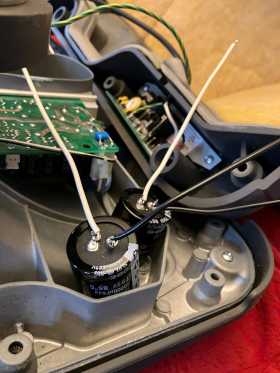
My experience has been that these parts tend to go "open" when they fail so there is no harm in leaving them in ("open" just means that it is like the parts are not there). Attaching the replacement capacitors to wires allows you to put them someplace convenient as shown in the image, and makes it a little easier if/when you have to replace them again.

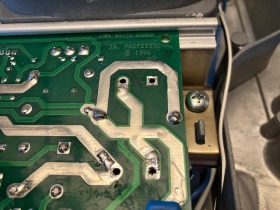
If you feel you must remove the bad parts, another trick you can use to speed up the process is to wedge a flat-edged screw driver gently between the board and the capacitors then heat up one of the pins and pushing on the side of the part to pull the pin out a bit. Repeat the process on the other pin, then repeat and the part will pop out after a few passes.
As it turns out, the parts recommended in the video were not in fact the right parts for my EON speakers and wouldn't work without my wire-trick. My EONs are of G1 vintage and the 5600uf 50V capacitors where the replacements [referenced in the video] were 10000uf 63V and slightly bigger than the original parts.
An important final step in this and any other mod is to cover everything with silicon rubber. I like the clear silicon so I can still inspect it (to an extent). Hot glue would probably work as well but the silicon provides a small level of immunity to vibration and is easier to remove with an exacto-knife if you have to go back (which you probably will since these tend to wear out).
By the time I got to the last of my four speakers, I had the repair time down to less than an hour (not counting silicon curing time) and most of that was dealing with the screws. I was using a battery powered drill with a phillips-head screwdriver tip and extensions though I set the torc low so the screws wouldn't be over-tightened. Your arm will hurt but you can also just use a regular phillips-head screwdriver as well.
I really enjoyed these speakers so I'm looking forward to indefinite use, with 10+ year intervals of TLC.
Bob
(Bob Sellon music)